My Goddess was surfing around on Instagram when she came across someone who had her nails done the 'galaxy' style by her manicurist. It looked really pretty and so intrigued by this, my Goddess decided to surf around to find out if this could be DIY.
And to her surprise, the galaxy nails isn't hard to do at all! It as even easier than ombre nails. So here's sharing with you the simple steps to getting pretty galaxy nails!
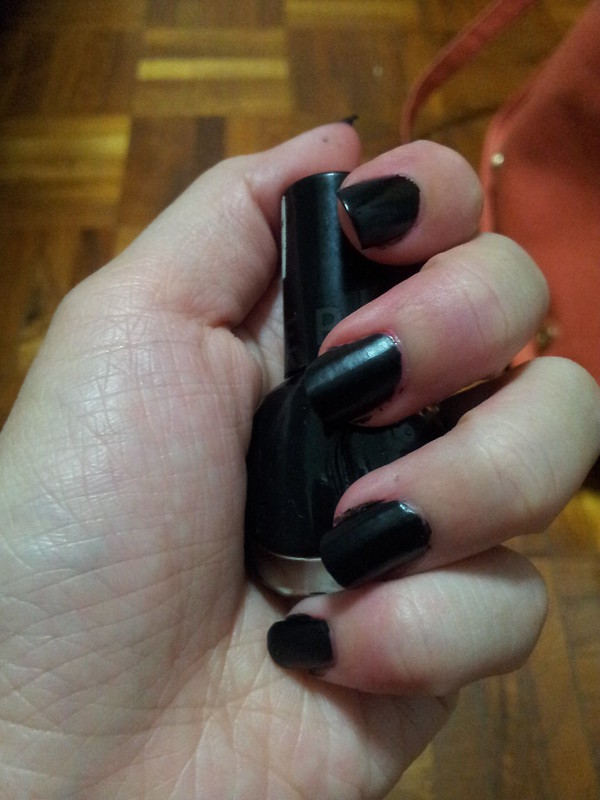
First paint your nails with a base coat followed by a black coat. My Goddess is using Sephora's matte black polish - the one that she got for her witch get-up.
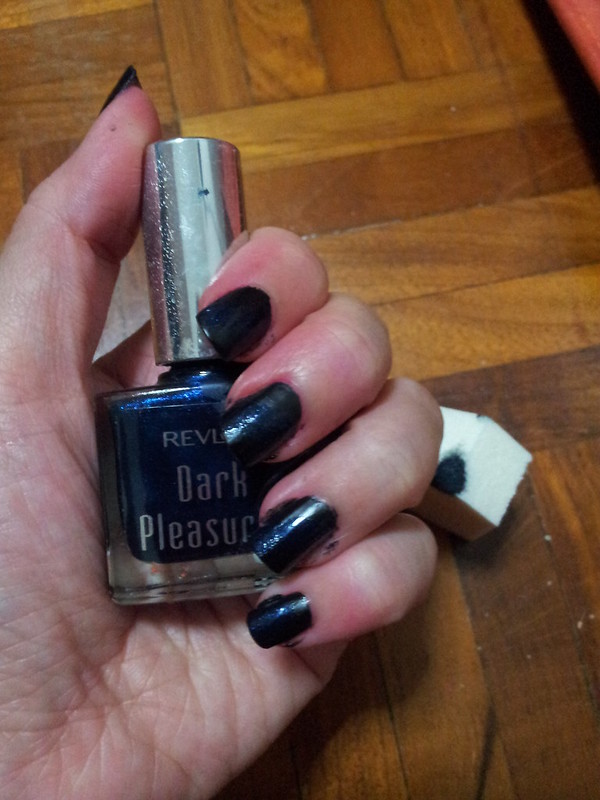
Then use a makeup sponge (see sponge in background), dab the polish using the polish brush onto the sponge. Remember to dab just a tiny area, otherwise your whole nail will be covered that colour and it will be hard to control. As you can see, my Goddess is using Revlon's Dark Pleasure. Not sure if this is still around - this was actually a gift from her ex-colleague a few years back. And Revlon has proved its long-lastingness by not clumping up at all.
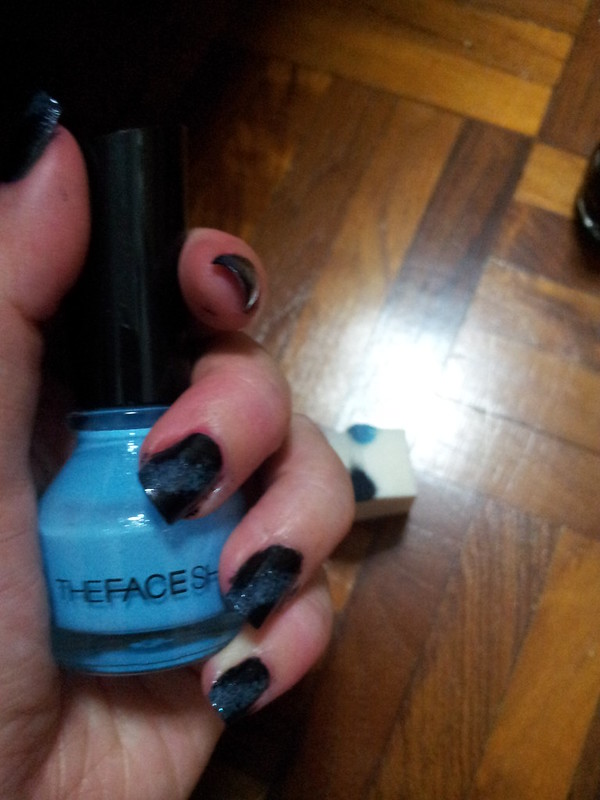
Next, using a lighter shade of blue, repeat the dabbing above and slight to the side of the dark blue dabs to create the milky way. You can do diagonal or slight swirls.
You may also want to use other colours like yellow, green and pink - you never really know what colours there might be in the galaxy do you?
But finishing off will of course be glitter! My Goddess didnt' have a clear polish with tiny glitter and one with big glitters, which is the ideal scenario. If you have the clear polish with tiny glitter, just paint it over your nails using the brush like you would do with the nail polish normally. Paint more glitter especially near the 'milky way' like a galaxy. Then, use a toothpick to pick up the big glitter from the other polish and stick 2-3 big ones randomly.
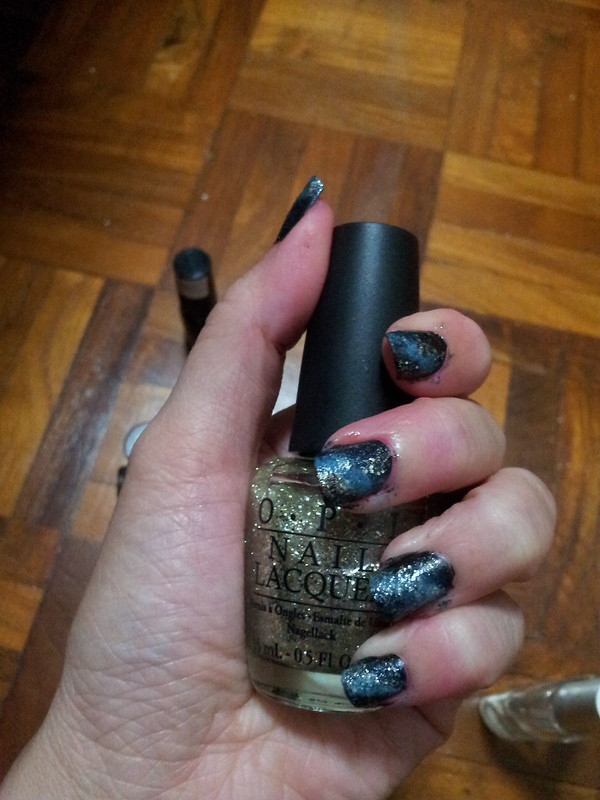
Making use with what she has - OPI's shimmery nail polish, the polish is again dabbed on using the sponge. To ensure more glitter congregate near the 'milky way', she repeated the dabbing more frequently at the lighter portion, and use the remaining polish on the sponge to dab on the rest of the mails.
If the light blue is a little faded off due to the silver/gold/glitter polish, repeat the above steps again. And the best thing is if you make a mistake, just dab black/dark blue over and you can start all over again. Meanwhile, don't forget to end off with a top coat to keep your glitters in place and to add extra shine to your galaxy!
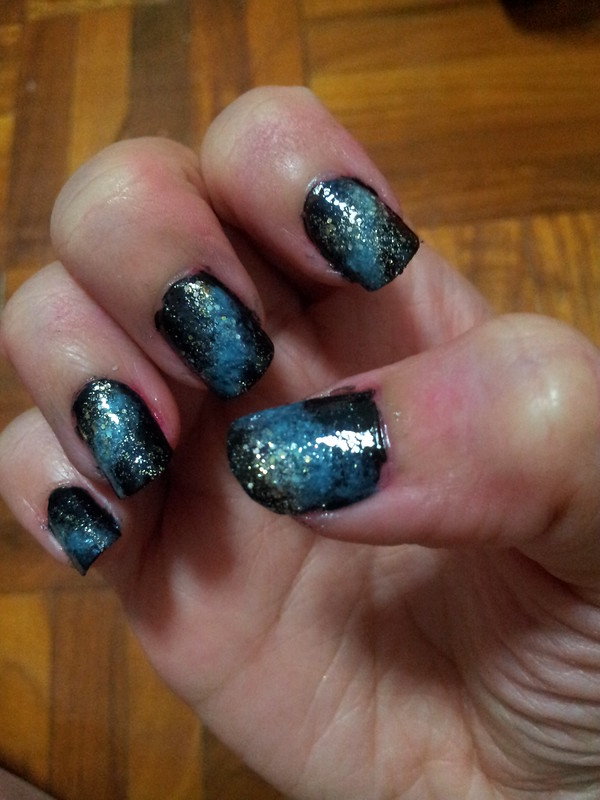
The whole process was less messy than she expected, probably cos this time she used the pointed edges of the sponge and dab only a little of the polish onto the corner of the sponge. The whole process was really fun. You can be sure that my Goddess will be trying out with other colours in the near future!
And there you go,my Goddess was then ready to attend her cousin-in-law's wedding!
1 comment:
Danke! Das ist sehr cool! :)
Post a Comment